After you have created your stencil, you have the option of deploying either locally or to a remote server where they can be downloaded from.
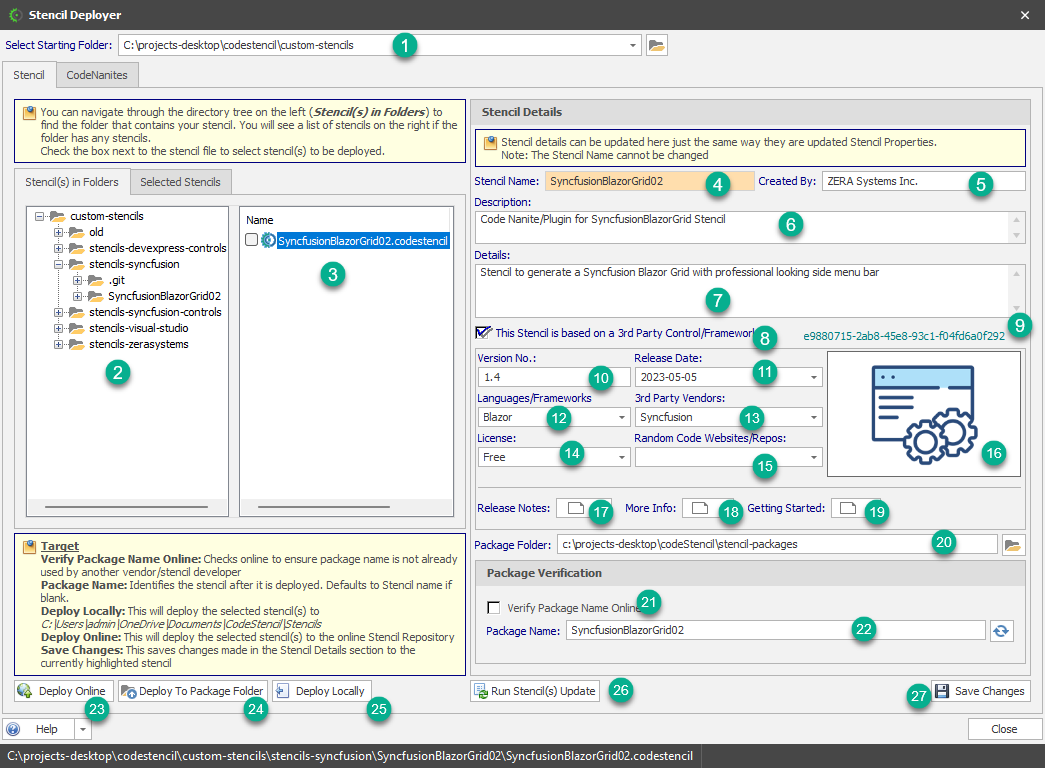
- Select Starting Folder - This is the top-level folder that will give you access to multiple folders that may contain stencils. Once you make a selection, the display in (2) below is updated.
- Stencil(s) in Folders - This is a listing of subfolders based on the folder selected in (1) above.
- Stencil File - This is where you select specific stencil(s) that you want to deploy.
- Stencil Name - This is the registered name of the stencil.
- Created By - This is the person or company that created the stencil.
- Description - This describes what the stencil is about.
- Details - Here are more details about the stencil.
- The Stencil is based on a 3rd Party -
- Guid -
- Version No -
- Release Date -
- Language/Frameworks -
- 3rd Party Vendors -
- License -
- Random Code Websites/Repos -
- Stencil Logo -
- Release Notes -
- More Info -
- Getting Started -
- Package Folder -
- Verify Package Name Online -
- Package Name -
- Deploy Online -
- Deploy To Package Folder -
- Deploy Locally -
- Run Stencil(s) Update -
- Save Changes -